

Welcome to Dubai-Real-Estate.com
Step 1 – Open Your Property Dashboard
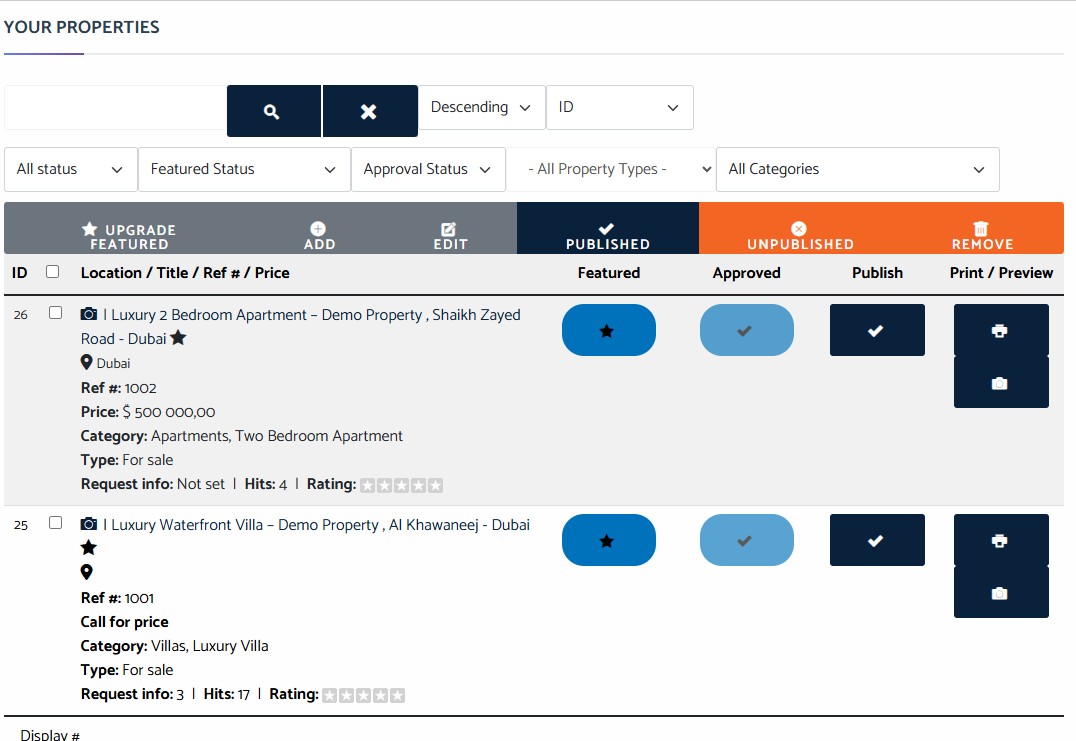
After logging into your agent account, you will be taken to Your Properties.
Here you can:
- View all your published and unpublished listings
- Edit existing properties
- Add a new property
- Publish or unpublish listings
- Feature premium properties
- Remove listings
- Print or preview your advertisements
Your dashboard gives you complete control over your portfolio from one convenient location.
Step 2 – Create a New Property
Click Add to create a new listing.
Every property is organised into five simple tabs:
- General Information
- Details
- Other Information
- History & Tax
- Photos
Simply complete each section before saving your listing.
Step 3 – General Information
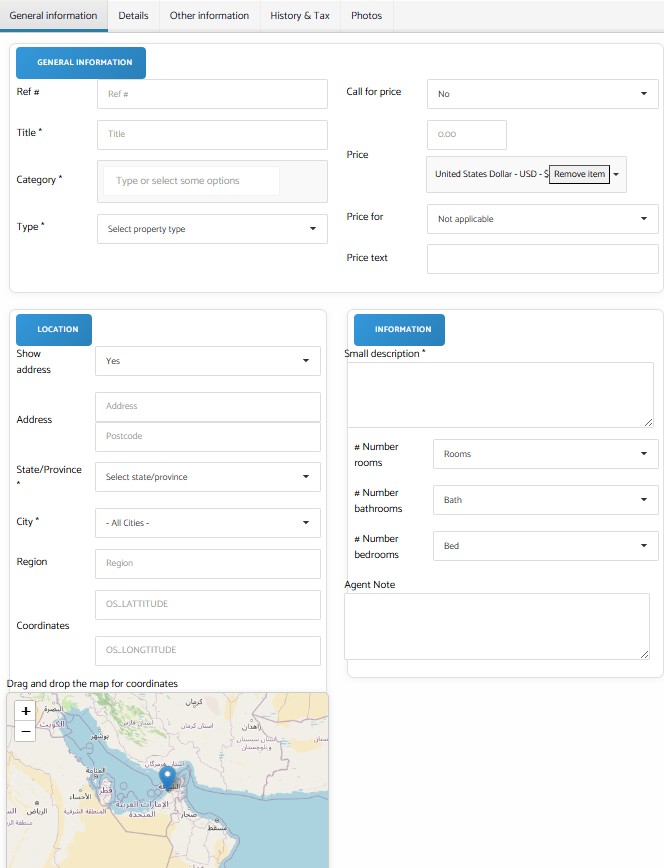
The General Information section contains the essential details buyers immediately want to know.
Complete the following information:
Basic Property Information
- Reference Number
- Property Title
- Property Category
- Property Type
- Sale or Rental
- Price
- Currency
- Price Text (optional)
- Call for Price option
Location
Accurate property locations improve buyer confidence and search results.
Enter:
- Address
- Community
- City
- Region
- Coordinates
- Display Address option
An interactive map allows you to position your property precisely.
Property Summary
Provide:
- Short Description
- Bedrooms
- Bathrooms
- Rooms
- Internal Agent Notes
This short introduction is displayed in property search results and should immediately capture the buyer's attention.
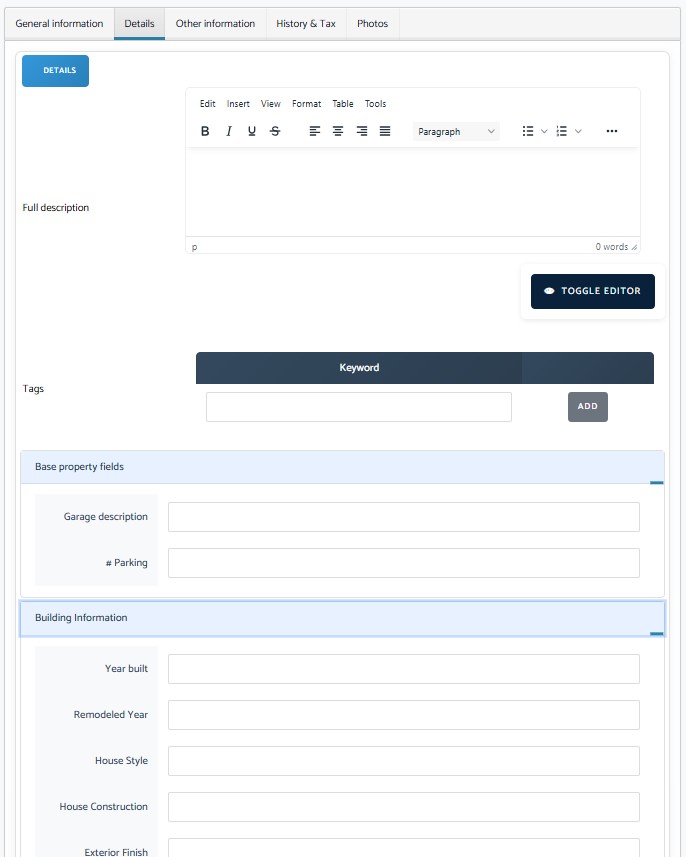
Step 4 – Property Details
This section allows you to create a professional presentation.
Start with a detailed property description highlighting:
- Architecture
- Interior Design
- Views
- Lifestyle
- Investment Potential
- Community
- Nearby Attractions
You may also add:
- Search Keywords
- Tags
- Garage Information
- Parking Spaces
- Building Information
- Construction Details
- Floor Areas
- Land Information
- Energy Classification
These structured fields improve search results and help buyers compare properties more efficiently.
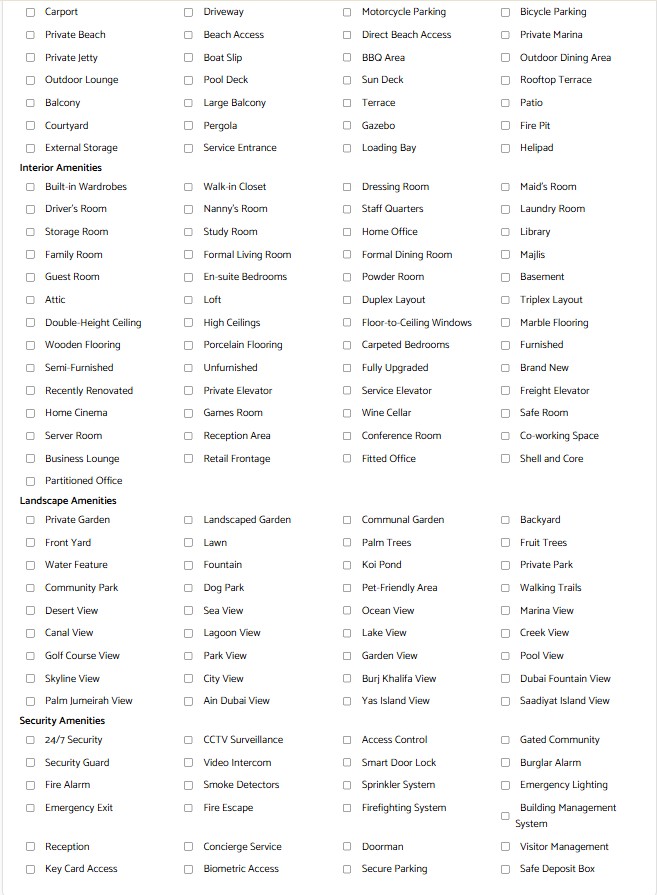
Step 5 – Select Amenities
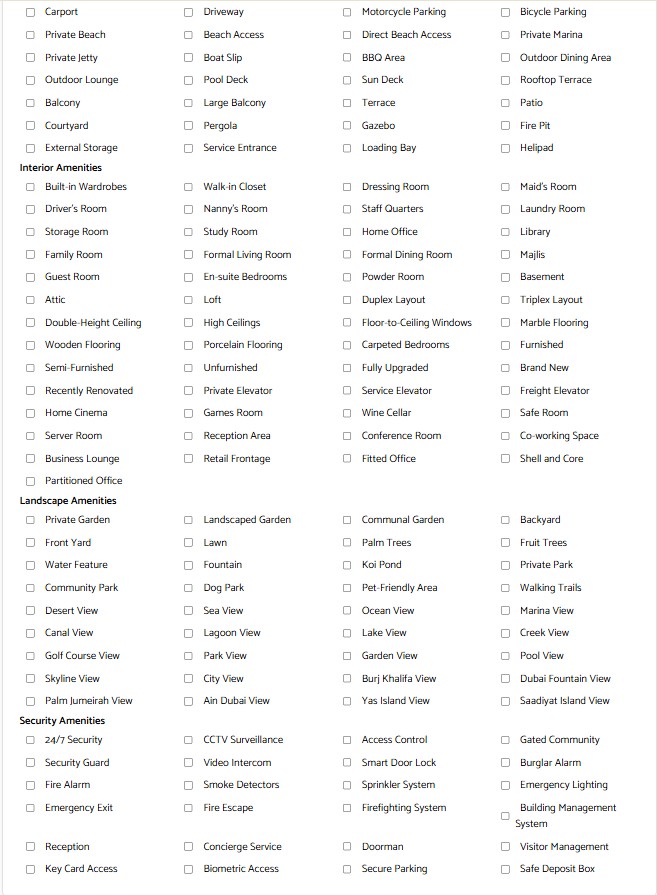
Dubai buyers often search for properties based on available facilities.
Our platform includes one of the largest amenity databases available.
Simply tick the boxes that apply to your property.
Examples include:
Smart Home
- Smart Home
- Home Automation
- Fiber Internet
- Smart Lighting
Kitchen
- Fully Fitted Kitchen
- Kitchen Island
- Coffee Machine
- Wine Cooler
Community
- Infinity Pool
- Gym
- Spa
- Sauna
- Kids Club
- Beach Club
- Marina Access
Exterior
- Private Pool
- Balcony
- Rooftop Terrace
- BBQ Area
- Private Beach
- Covered Parking
Interior
- Walk-in Closet
- Maid's Room
- Home Office
- Double Height Ceiling
- Floor-to-Ceiling Windows
- Marble Flooring
Views
- Sea View
- Marina View
- Burj Khalifa View
- Palm View
- Skyline View
- Canal View
- Pool View
Security
- CCTV
- Concierge
- Gated Community
- Access Control
- Smart Door Lock
- Reception
- 24/7 Security
The more information you provide, the more precisely buyers can filter your property.
Step 6 – Additional Information
The Other Information tab allows you to enrich your listing with valuable marketing material.
Add:
- Open House Dates
- SEO Meta Description
- Video Presentation
- YouTube Video
- Virtual Tour
- Panorama
- PDF Brochures
- Floor Plans
- Documents
- Property Certificates
You can also indicate nearby facilities such as:
- Schools
- Hospitals
- Shopping Centres
- Airports
- Beaches
- Parks
- Metro Stations
- Coffee Shops
- Universities
These additional details improve both buyer experience and search engine visibility.
Step 7 – Property History
Where appropriate, you may enter:
- Previous Sales
- Historical Prices
- Tax Information
- Property History
Although optional, this information provides greater transparency for investors.
Step 7 – Property History
Where appropriate, you may enter:
- Previous Sales
- Historical Prices
- Tax Information
- Property History
Although optional, this information provides greater transparency for investors.
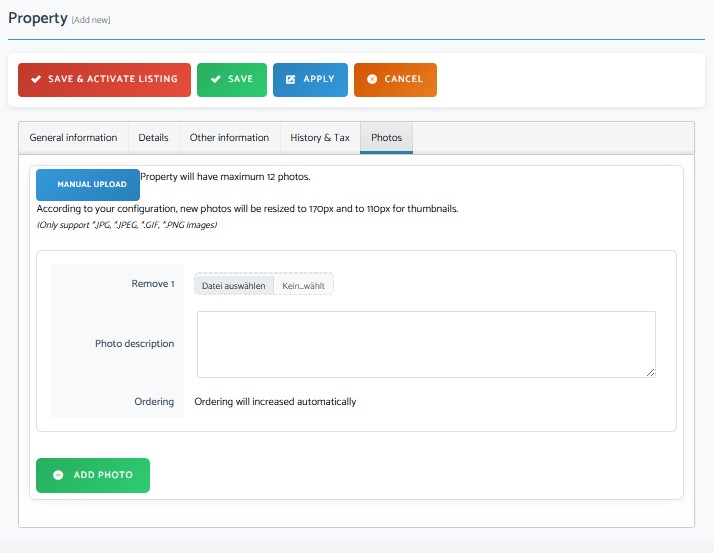
Step 8 – Upload Professional Photos
Images sell properties.
Our system supports multiple high-quality images for every listing.
For the best results:
- Upload bright, high-resolution photographs
- Start with your strongest exterior image
- Add living room, kitchen and bedrooms
- Include bathrooms
- Show balconies and views
- Highlight community facilities
- Finish with lifestyle images
Professional photography can dramatically increase buyer enquiries.
(Insert Screenshot: Photo Upload)
Step 9 – Save and Publish
Once all information has been entered, simply choose:
Save & Activate Listing
Your property will immediately become available to buyers once it has been approved (if approval is required).
You can return to your dashboard at any time to:
- Edit your listing
- Update prices
- Add new photos
- Change descriptions
- Publish or unpublish
- Upgrade to Featured Listing